
A couple of weeks ago I gave a introduction to hacking with a hands-on lab on the WMUG Saturday . Based on the positive reactions of this hands on lab, I decided to write up how to set up the lab enviroment and I will write down the hands on lab I made.
At first, set up the lab infrastructure
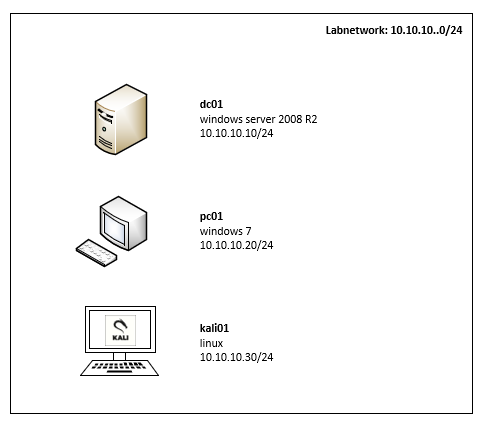
The lab infrastructure consists of :
1) Domain Controller [Windows Server 2008 R2]
2) Windows PC [Windows 7]
3) Kali Linux [latest version]
For the OS choice, I chose Windows 2008R2 (without any patch) and Windows 7 (unpatched). The benefit for this descision is that you can play with multiple known exploits, which is good for the understanding how things work.
Since Kali Linux is an open source initiative, you can download the virtual editions here:
- https://www.offensive-security.com/kali-linux-vm-vmware-virtualbox-hyperv-image-download
Step 1:
Login to the windows server 2008 R2 and apply the following actions:
* set the ip adress to 10.10.10.10 255.255.255.0
* set the DNS to 10.10.10.10
* set the hostname to DC01
* make the server a domain controller (hacklab.org) (reboot when needed)
* disable all windows updates
* disable all firewalls
Step 2:
Login to the Windows 7 PC
* set the ip address to 10.10.10.20 255.255.255.0
* set the dns to 10.10.10.10
* set the hostname to PC01
* reboot
* join the windows 7 PC to the hacklab (reboot)
* disable all windows updates
* disable all firewalls
Step 3:
* Login on the KALI Linux box
* the default username is root and default password is toor
* setup the network interface (IPV4) with 10.10.10.30 255.255.255.0
* verify you can ping to 10.10.10.10 and 10.10.10.20 (CTRL-Z)
Step 4:
* add a new user to the active directory
* login with this user on the Windows 7 PC
You are ready for the LAB!